Considering the size of the red light bed and practical usage needs, we specifically designed it to be detachable. The unit is securely packaged for transportation to ensure it arrives in perfect condition. Once delivered, it can be easily disassembled to fit through doorways or narrow spaces, eliminating any concerns about accessibility.
For a step-by-step guide, watch our instructional video below:
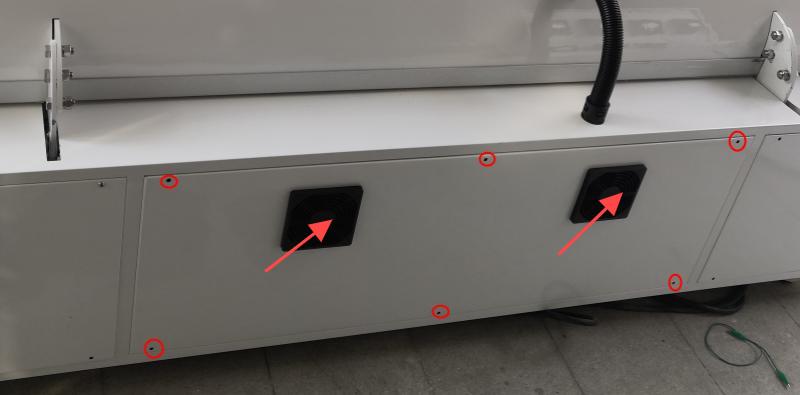
Disassembly Steps: 1. Remove the six screws marked in red on the middle sealing plate using a 4mm hex key, slowly remove the rear sealing plate, and remove the internal connection terminals of the two fans indicated by the arrows on the sealing plate. Then remove the sealing plate.
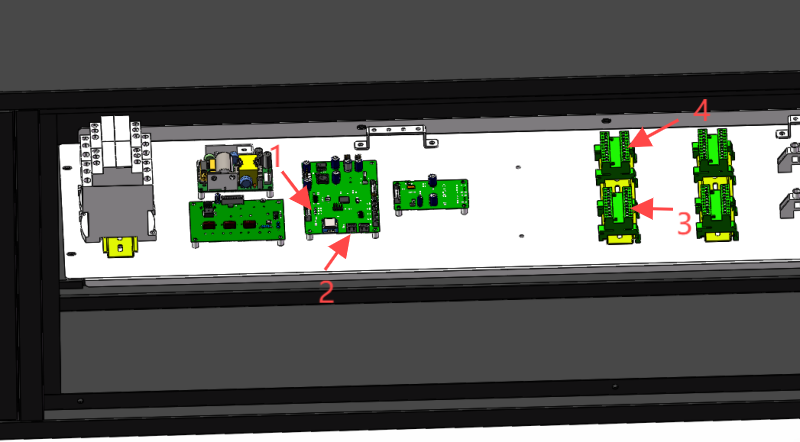
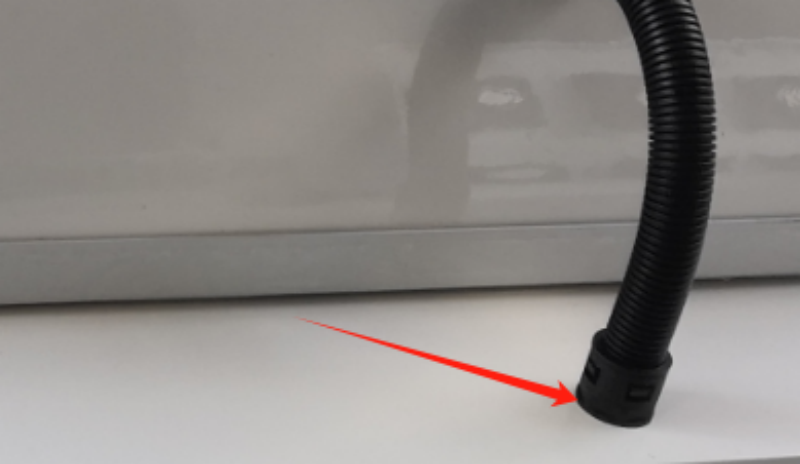
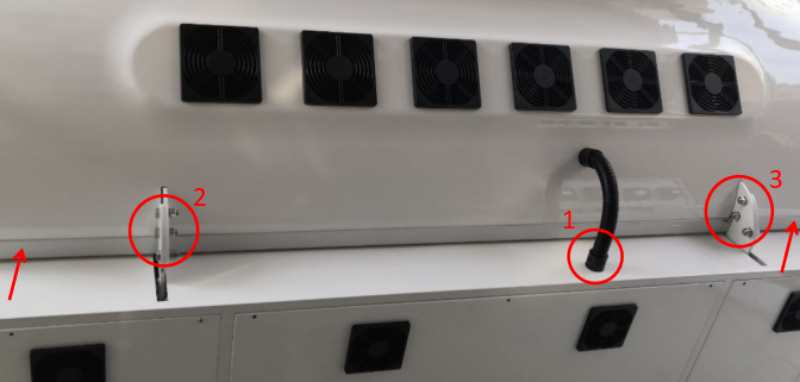
2. Remove cable terminals 1, 2, 3, and 4 marked in red on the upper cover and fan connection terminals. 3. Remove the nuts inside the bellows connector of the rear box. 4. Remove all wiring terminals from the corrugated pipe fastening nut and round cable hole at place 1 below the picture.
5. Open the upper cabin completely, arrange four people to lift the metal parts at the four corners of the upper cabin (indicated by arrows), and remove the 6 screws at places 2 and 3 in the picture. 6. After removing the bolts, lift the upper compartment away. Note: The installation steps can be reversed.
May
We use Cookie to improve your online experience. By continuing browsing this website, we assume you agree our use of Cookie.